 by
by 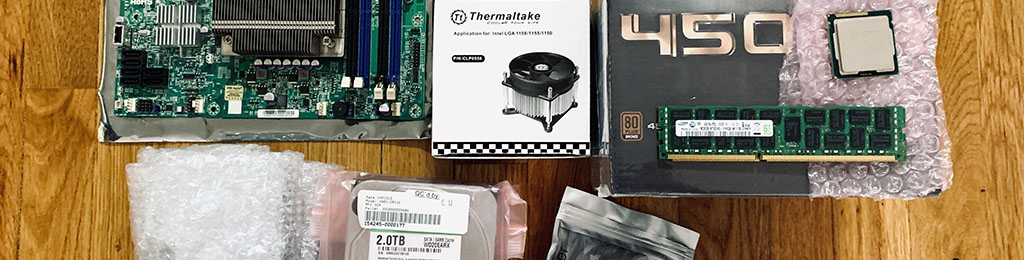
One day I’m sitting on the couch editing photos on my laptop when it hits me, if I want to access them on any of the other devices at home, it’s going to be a PITA. It’s annoying to move between my desktop and laptop, it’s even more annoying to send the finished photos to a mobile device and vice versa. Annoying I can live survive with, but then something else hit me, none of my computers have a backup… not a current one anyway. I mean come on, multiple external drives, trying to find them, having to connect them… Ain’t nobody got time for that.
It was time for a change.
I decided I’m going to build myself something to centralize my storage, this way I can access everything I need hassle free and so that I could set up all the computers to regularly (and automatically!) back themselves up to one place. I was also going to free up some space on my desktop computer for other things. I wanted external drives to become a thing of the past in this house, almost as much as I wanted everyone’s data to be safe in case of failure. If you’re only interested in specs, scroll to the end!
I didn’t want to spend a ton of money but I also wanted server components for this build (SERVER, hell yeah!). Used parts was going to be the way for me, I really had no issue with this approach since it would work way better than the nothing that I had then. I wanted something that wouldn’t get me in trouble when the electric bill came, so first on the list was going to be the CPU. At the time I still had an i5 2500K in my desktop so I didn’t mind going with something older, I figured the 2500K serves me well so a Xeon processor from that time would be more than plenty. Remember, storage was my main goal and I could’ve got away with basically anything that could boot a computer… but goals change, right? Quickly I decided that in addition to storage this was going to be a media server with possibly some encoding being done. It would also be used to host a couple of virtual machines, because why not.
I didn’t know much about Xeon CPUs, but it turned out they make low power consumption processors, perfect. LGA1155 boards were priced well at the time, as were the processors. I ended up with a Xeon E3-1260L, 4 physical cores and 8 threads at 2.4GHz with the ability to boost to 3.3GHz. $35 on eBay! Not bad… and should do the trick!
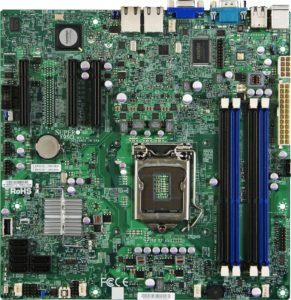 The thing with buying older parts is that they’ve been around and there is a ton of information on the web. This was good, because I didn’t know what motherboard I was going to get. All I knew was it would be LGA1155 because the processor needs to fit, it should support ECC RAM (error correcting code memory), and it should have a bunch of SATA ports… that was basically it for my requirements. Almost every website and forum in my quest recommended the SuperMicro X9SCL/M due to both price and function! Off to eBay we went… I ended up purchasing the SuperMicro X9SCL for $25 bucks! But get this, it even included an Intel i3 2120 – talk about bang for your buck.
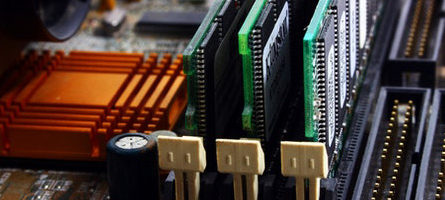
Buying RAM should’ve been the easy part yet turned into a mission, but it was my own fault. ECC memory is plentiful on eBay as long as you’re looking for registered memory. The board I bought only works with unbuffered memory! Whoops. This type of RAM is less plentiful, and the price said it all… it was about twice the price of registered ECC memory. To save a buck I figured I would go with 16GB to start with and leave myself two empty slots for later expansion. After some searching I landed 16GB (2x8GB) for $40.
By no means do I recommend doing what I did next, even though everything is still chugging along a year later.
Now it was time to purchase some storage, for sure I would cheap out here as well… after all it was a budget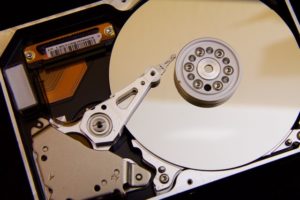 build. For this I was going to get a bunch of mechanical drives, I wanted to play with RAID or storage pools and speed wasn’t a concern for the tasks at hand. I decided the OS would sit on a pair of smaller drives in RAID1 so I bought a used pair of 500GB Seagate Barracudas for $20 bucks for this purpose. For the actual storage I went back and forth between a few options: RAID1, RAID5 or RAID6. Ideally I would have set up a RAID6 array, but I only had four SATA ports left without having to buy an expansion card and extra drives… so that was out. RAID1 was highly recommended, RAID5 was not – guess which I chose. Yep, RAID5, I like to go against the grain and this wasn’t being used for mission critical stuff. I found a lot of 3 x 2TB WD Caviar Green drives. This was going to give me enough storage, it was cheaper than 2 x 4GB drives in a RAID1, one parity drive is still better than none (hopefully), and 5400RPM was fast enough to store files on. They cost me $45 bucks!
Remember I said I don’t recommend used drives? One of the WD Green drives made an absolutely disgusting grinding noise as soon as I powered them on. Luckily the eBay seller was very kind and sent me a replacement immediately! Of course this made me nervous but it didn’t deter me from using them. In all reality this could happen to any drive as they have many moving parts and they sometimes fail randomly, which is why we always backup our data!
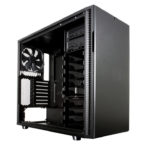 At this point my plan for a small build fell apart, I needed to fit too many drives. I wasn’t looking for anything specific but wanted space for even more drives and a bigger motherboard some time down the road. Options are always good. Fractal Design seemed to be highly recommended, specifically the R5, but it carried a bit of a price tag at around $130 (when you consider the cost of the rest of the system). I was in love with this case and eventually came across an open box from Amazon for a cool $100. Done!
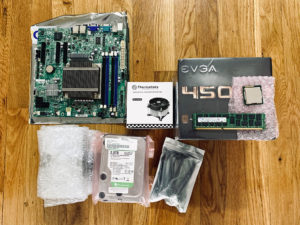
The rest of the parts were new and uneventful. I bought a EVGA 450W 80+ bronze power supply for $40, a Thermaltake CPU cooler for $13, and a 6-pack of SATA cables for $6.
Final Specs and Cost
- Intel Xeon E3 1260L – $35
- SuperMicro X9SCL (and free i3) – $25
- RAM 2 x 8GB ECC UDIMM – $40
- HDDs (2 x 500GB, 3 x 2TB) – $65 total
- PSU – $40
- Case – $100
- Cooler – $13
- Cables – $6
- Total – $324
Is this the cheapest build possible? Probably not, but I think it’s a pretty good deal for what I got in return! It’s been running 24/7 for almost one year to the day. I have since added a small SSD drive I had laying around for running virtual machines and if you plan on doing that then I highly recommend getting an SSD in there. I’m also down to less than 1TB of free space, so look out for an update not too long from now.
Thanks for reading!